A Step-by-Step Guide to Training and Testing the BB-ACT AI Model
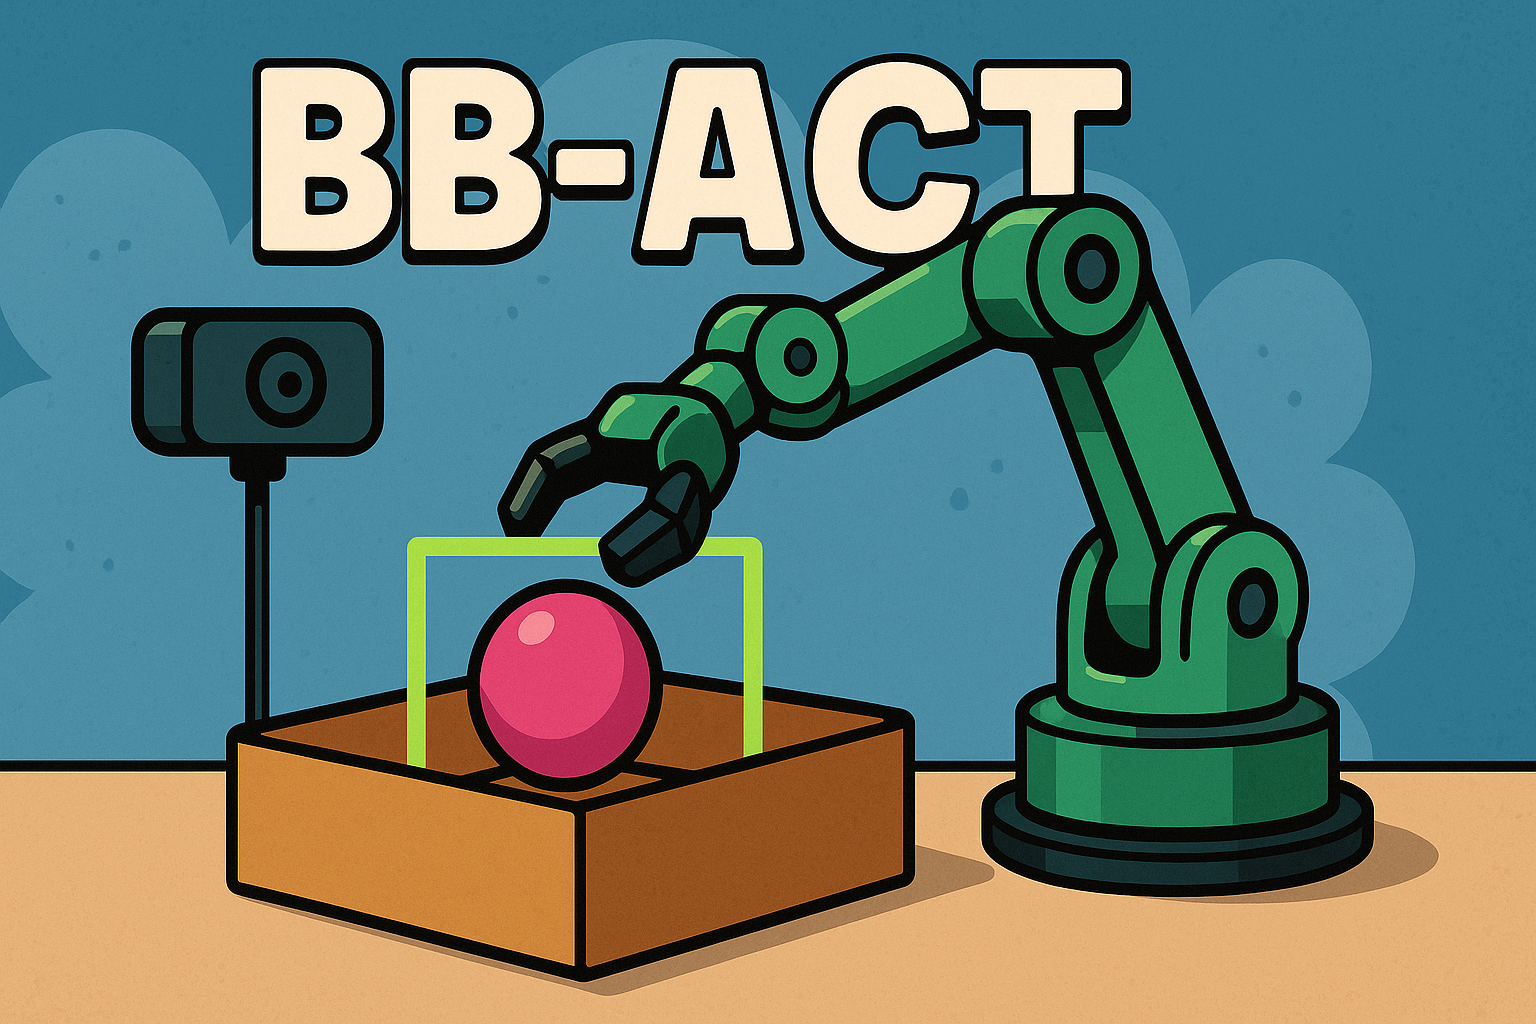
BB-ACT is an ACT (Action Chuking Transformer) model enhanced with bounding boxes conditioning. It allows your robot to perform complex "pick and place" tasks.
In this blog post, we’ll show you just how easy it is to train and test BB-ACT.
How to train BB-ACT?
To train and test BB-ACT, you'll need to install phospho on your computer. If you haven't installed it yet, you can follow our quick-start guide in the official documentation.
# macos
curl -fsSL https://raw.githubusercontent.com/phospho-app/phosphobot/main/install.sh | bash
# linux
curl -fsSL https://raw.githubusercontent.com/phospho-app/phosphobot/main/install.sh | sudo bash
# windows
powershell -ExecutionPolicy ByPass -Command "irm https://raw.githubusercontent.com/phospho-app/phosphobot/main/install.ps1 | iex"
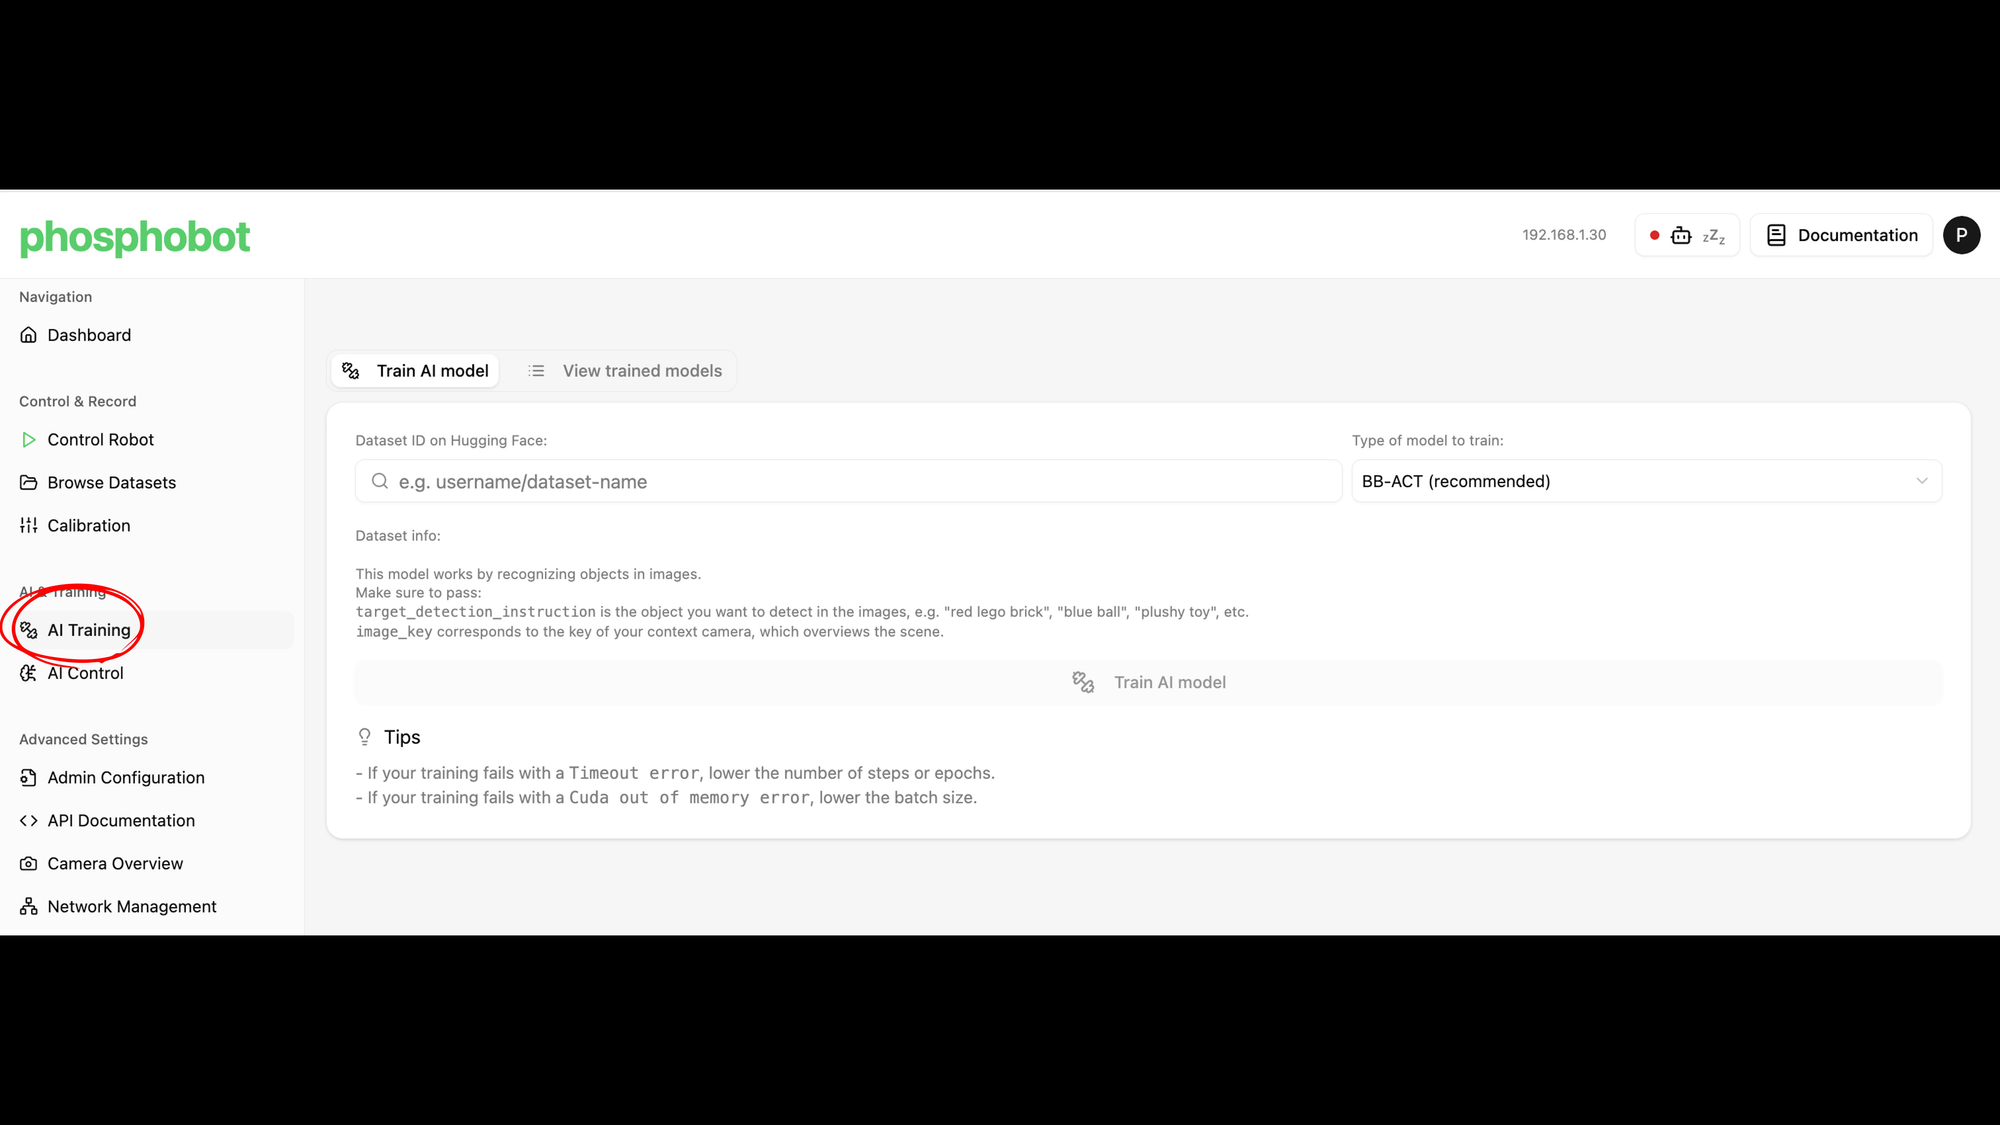
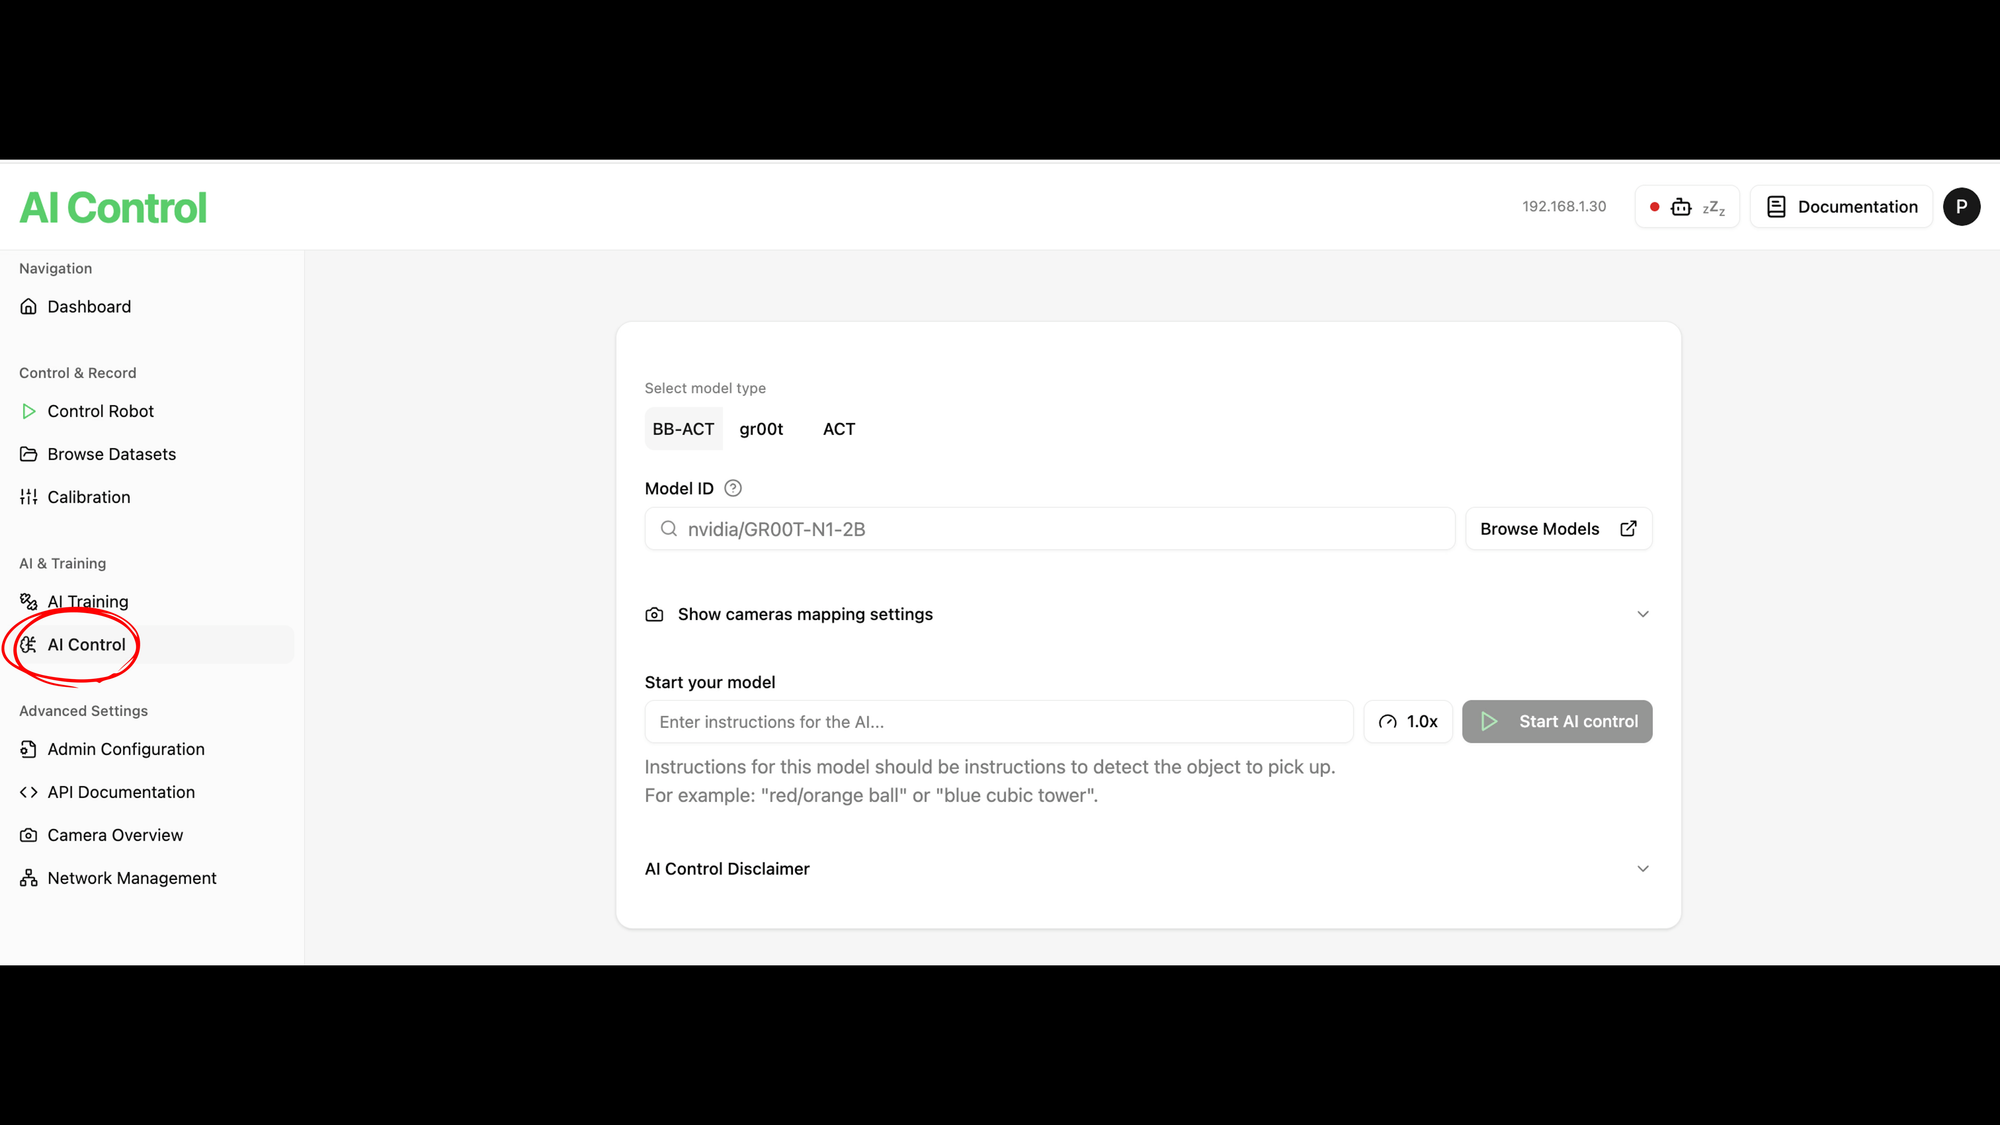
In your phospho dashboard, go to the AI & Training section and click on AI Training.
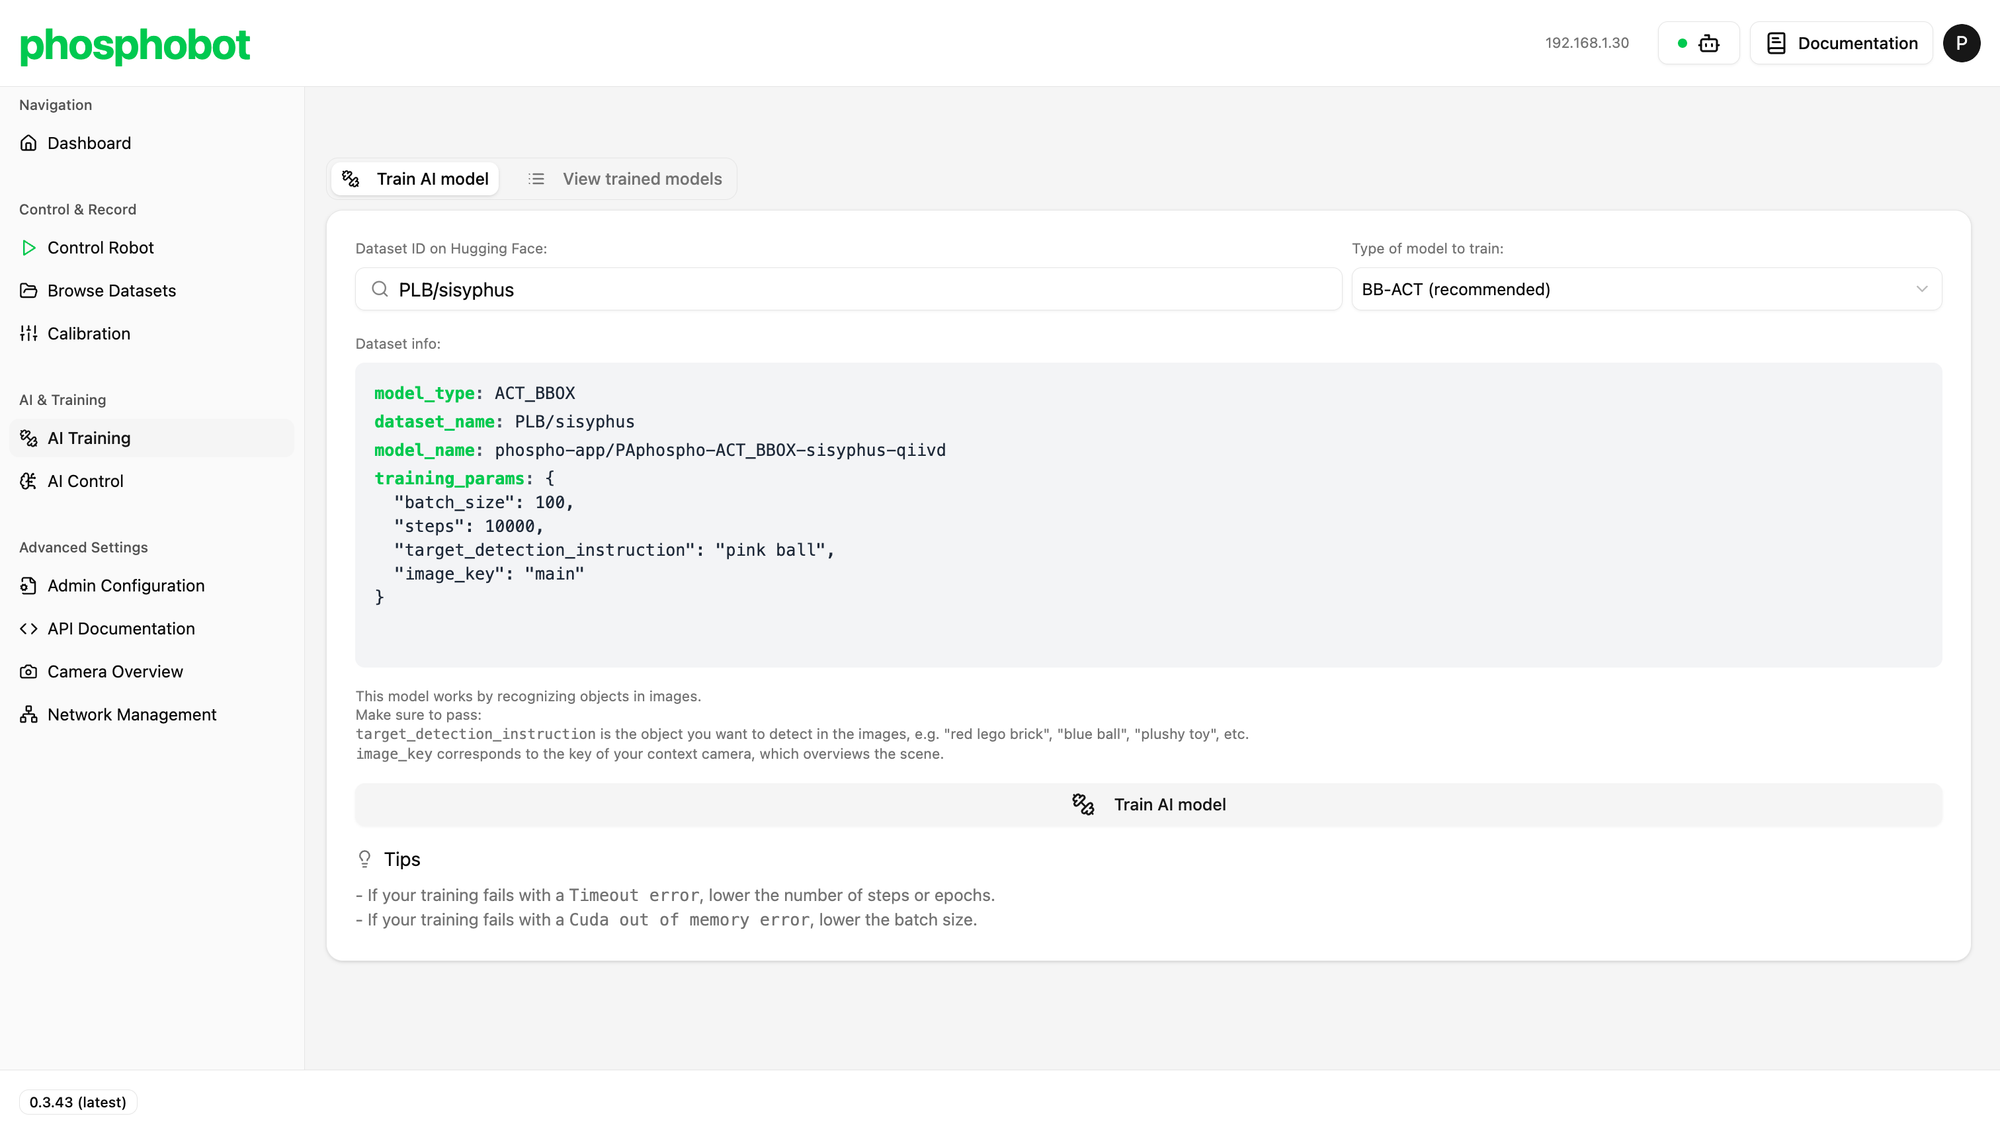
Step 1: Enter Your Dataset ID
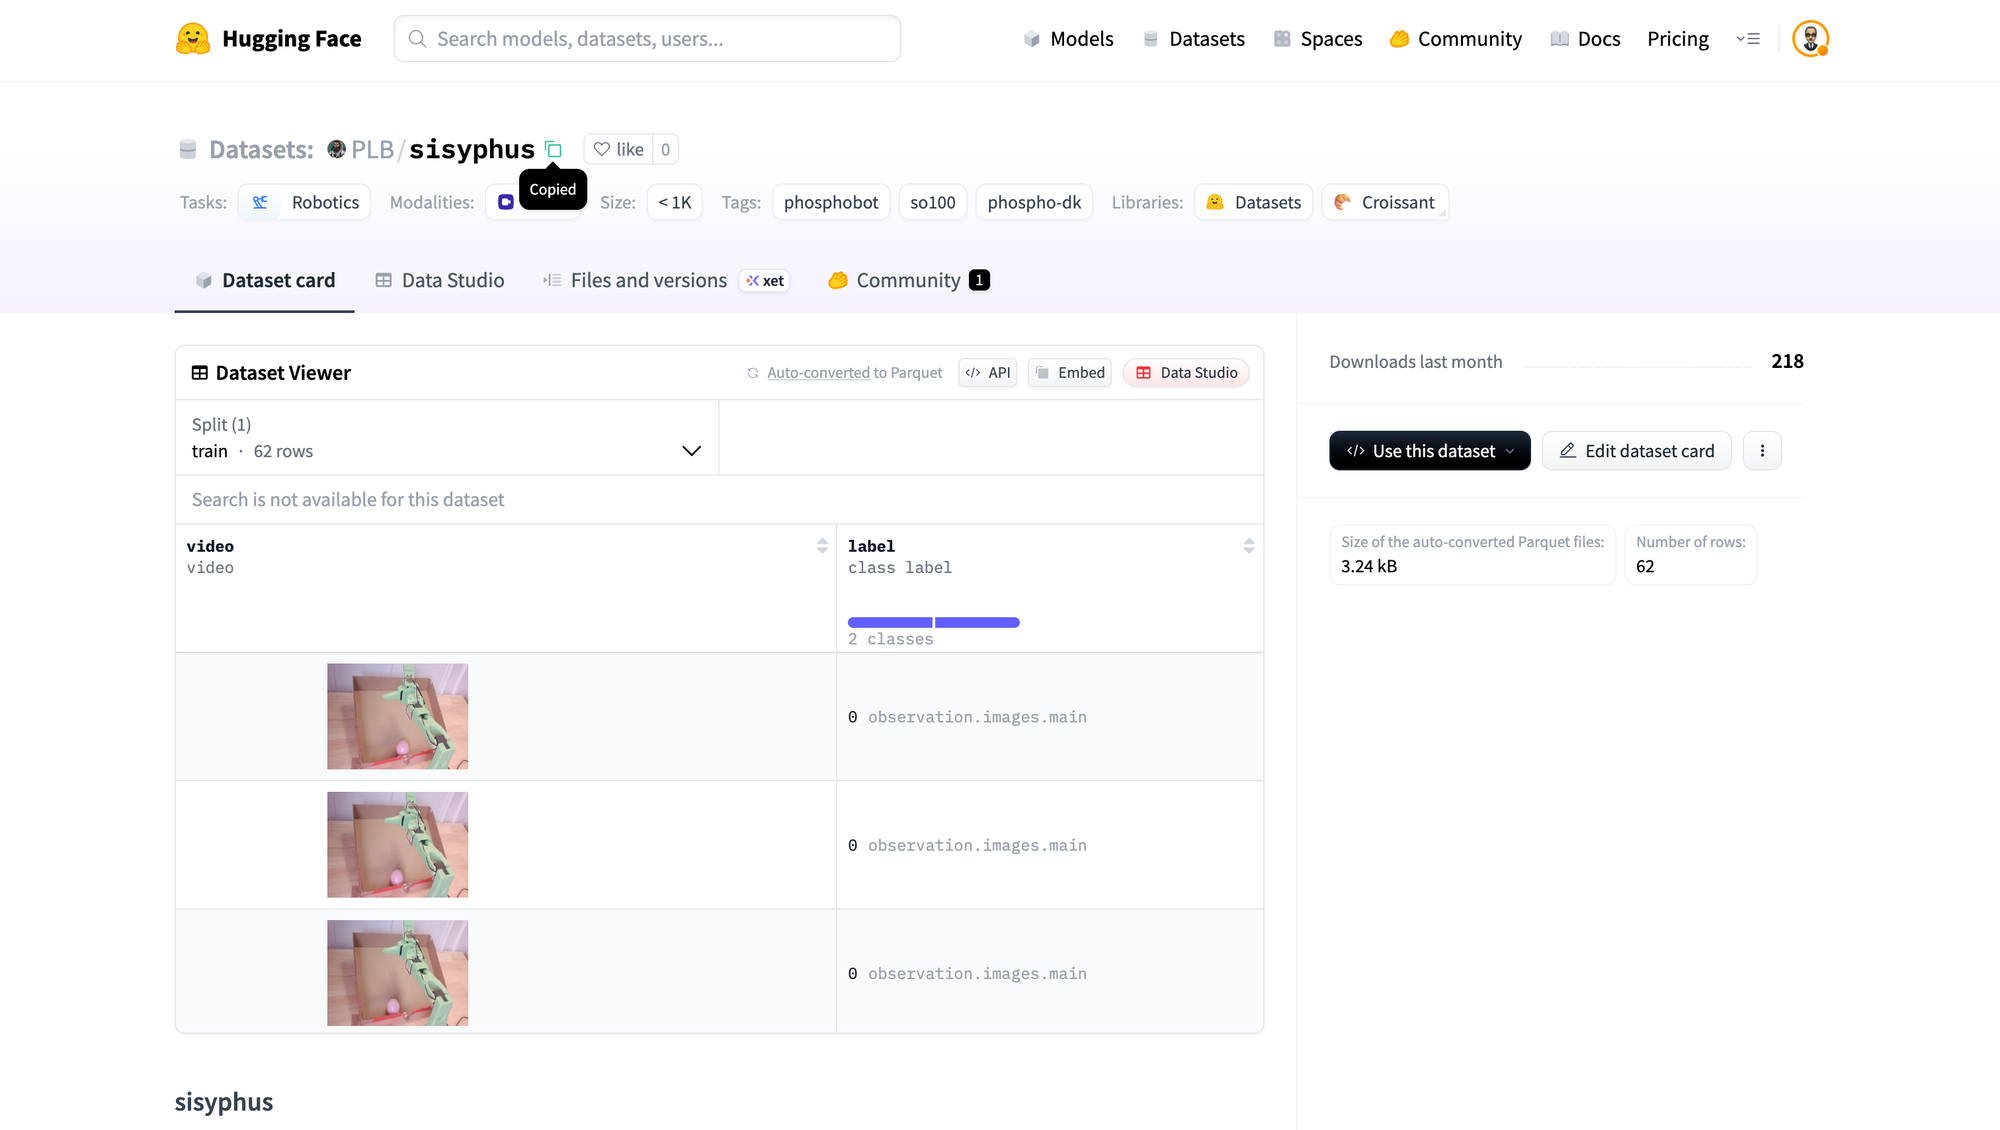
Go to your dataset's page on Hugging Face and copy its ID (it will be in the format your-username/dataset-name). Paste this into the "Dataset ID on Hugging Face" field in the dashboard.
Step 2: Configure the Training Parameters
BB-ACT is an ACT model enhanced with Bounding Boxes (that's what "BB" stands for!). This allows it to first locate the object in the scene and then act upon it, which dramatically improves performance.
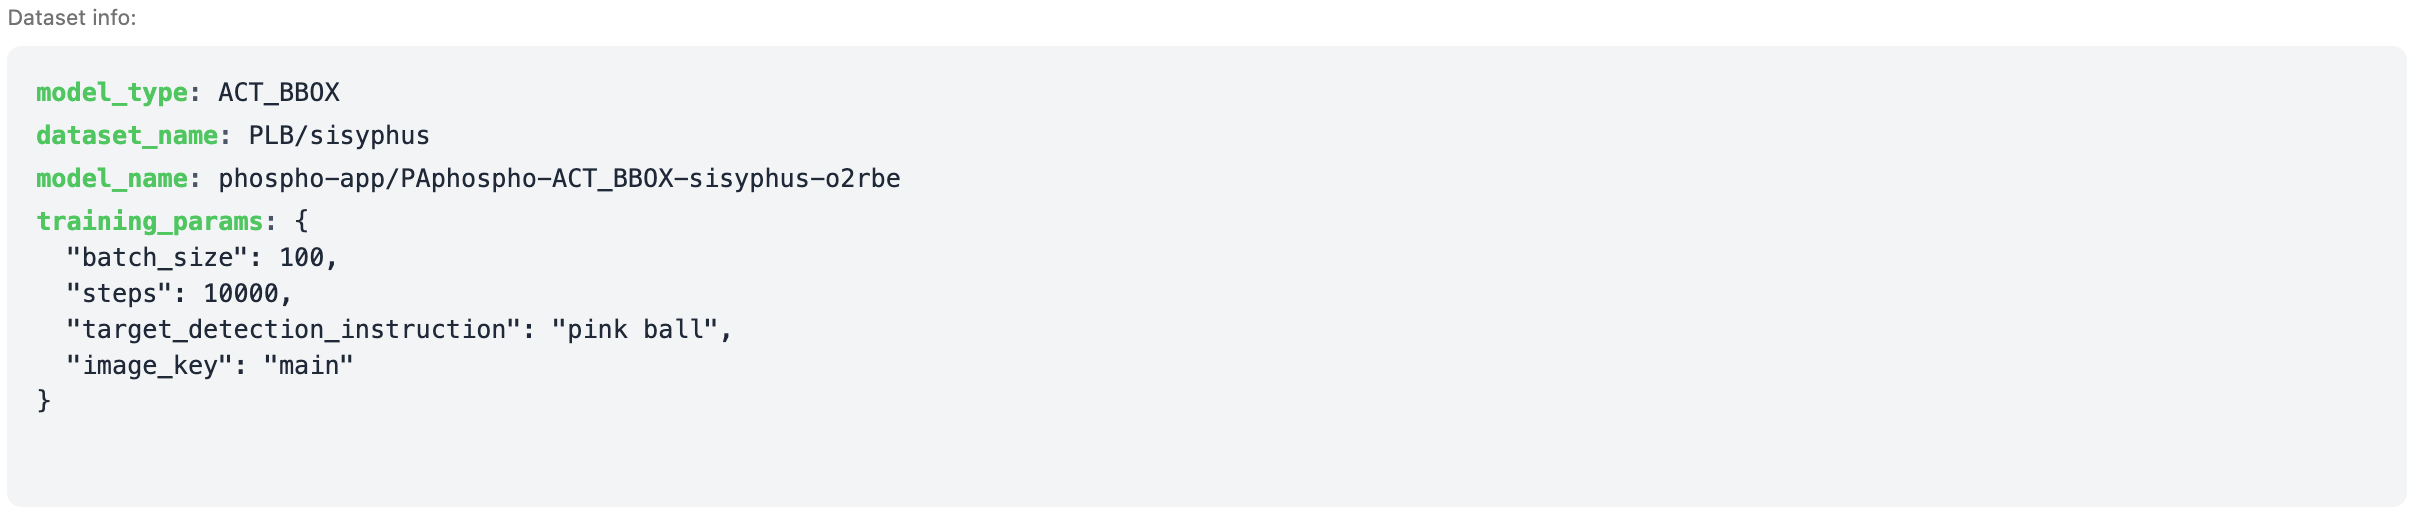
When you enter your dataset ID, a configuration file will appear. You need to pay special attention to two parameters:
- target_detection_instruction: This is a simple, natural language description of the object you want the robot to detect. For this tutorial, we change the example text to "pink ball".
- image_key: This tells the model which camera feed to use as the context view.
Pro Tip: Finding Your image_key
The image_key can sometimes be different depending on your recording configuration (e.g., secondary_0). To be sure, inspect your dataset on Hugging Face using the LeRobot viewer.

Here's what your training config should look like:
Step 3: Start Training!
Once your parameters are set, click the Train AI model button. The training process will begin. For a dataset of this size, it should take about 15-20 minutes.
How to run your BB-ACT model?
Step 1: Pre-Inference Checklist
Before you start, run through these crucial steps:
- Connect Hardware: Ensure your robot and cameras are plugged into your computer.
- Check the Setup: Verify that your robot and context camera are in the exact same positions as they were during data recording.
- Clear the Workspace: Make sure the area is clear and the target object is placed within the robot's reach.
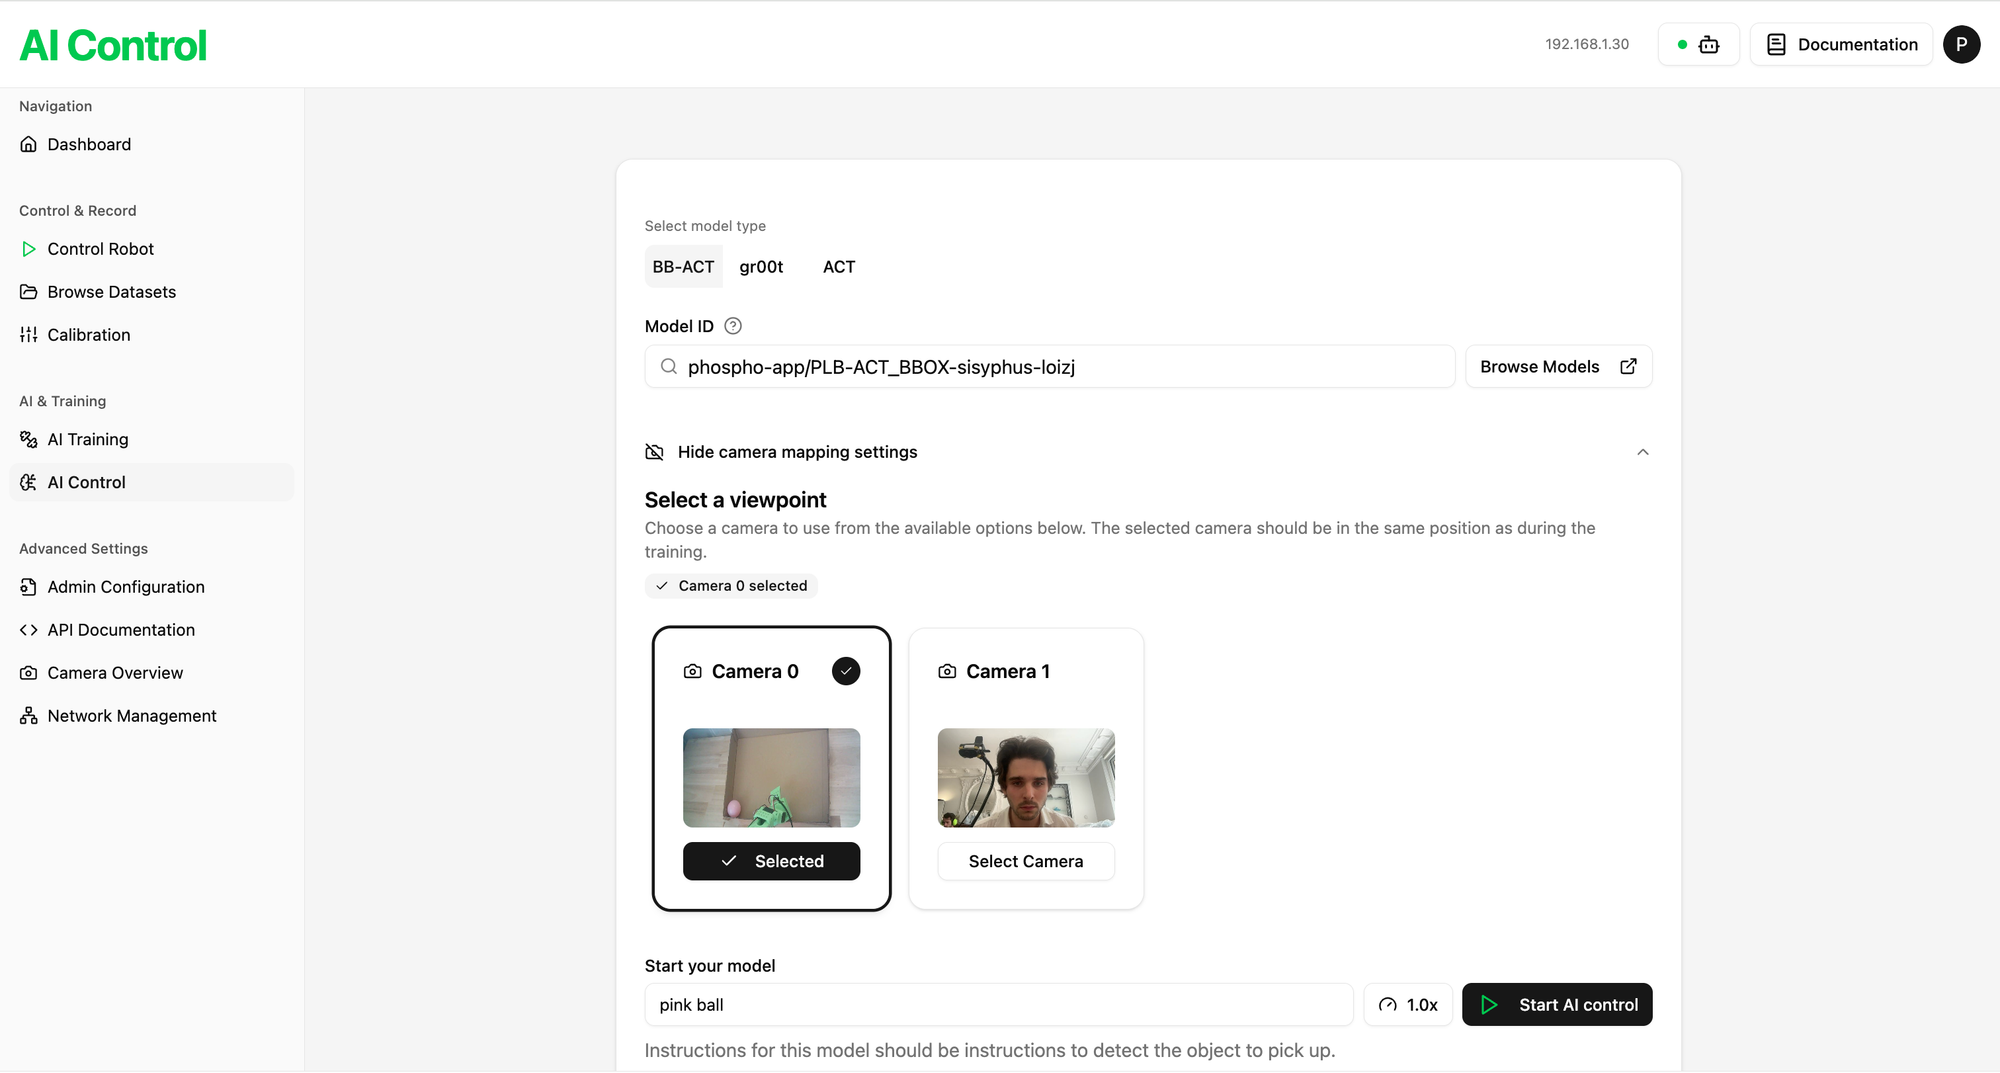
Finally, in the phospho dashboard, navigate to the AI Control page.
Step 2: Select Your Trained Model
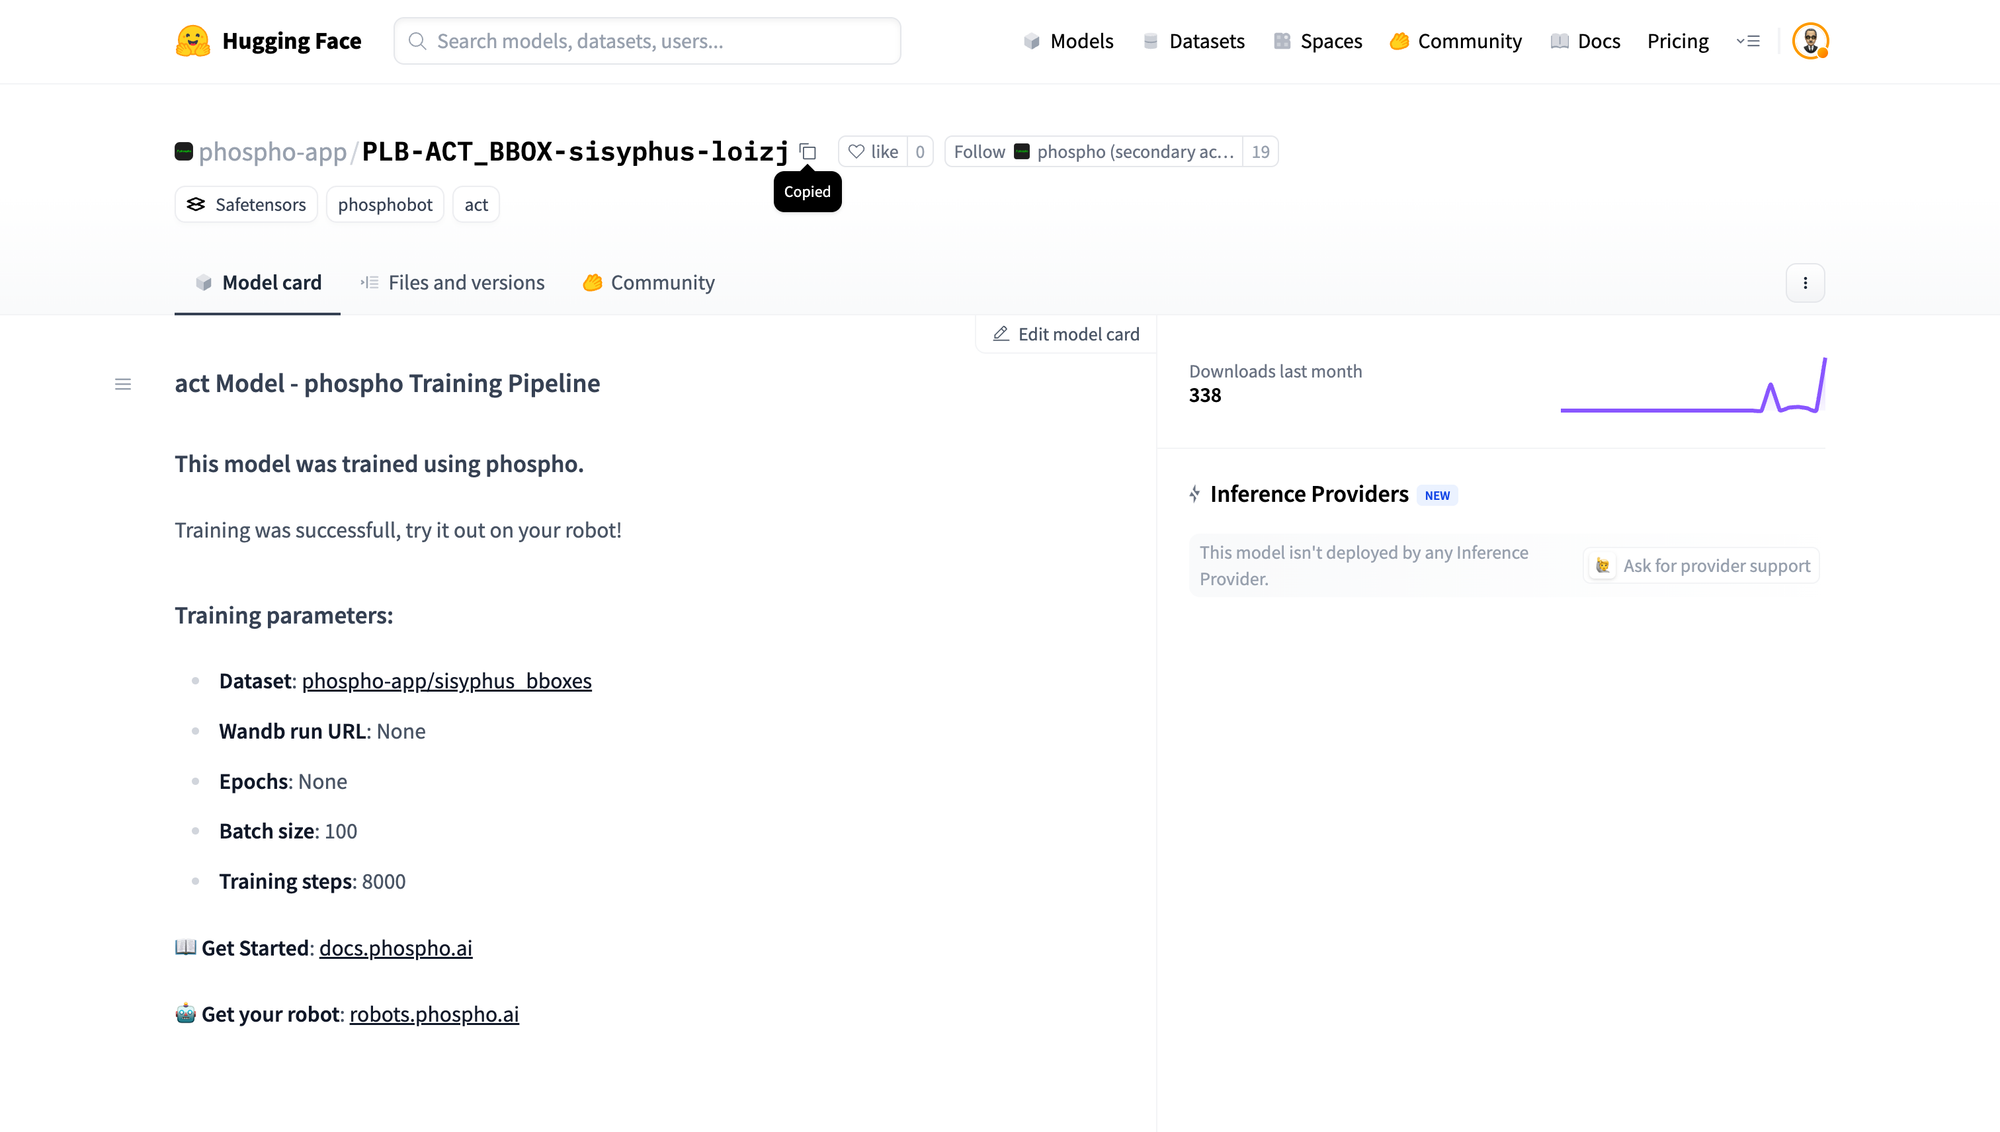
The training process created a new model on Hugging Face. Find this new model, copy its ID, and paste it into the Model ID field on the AI Control page.
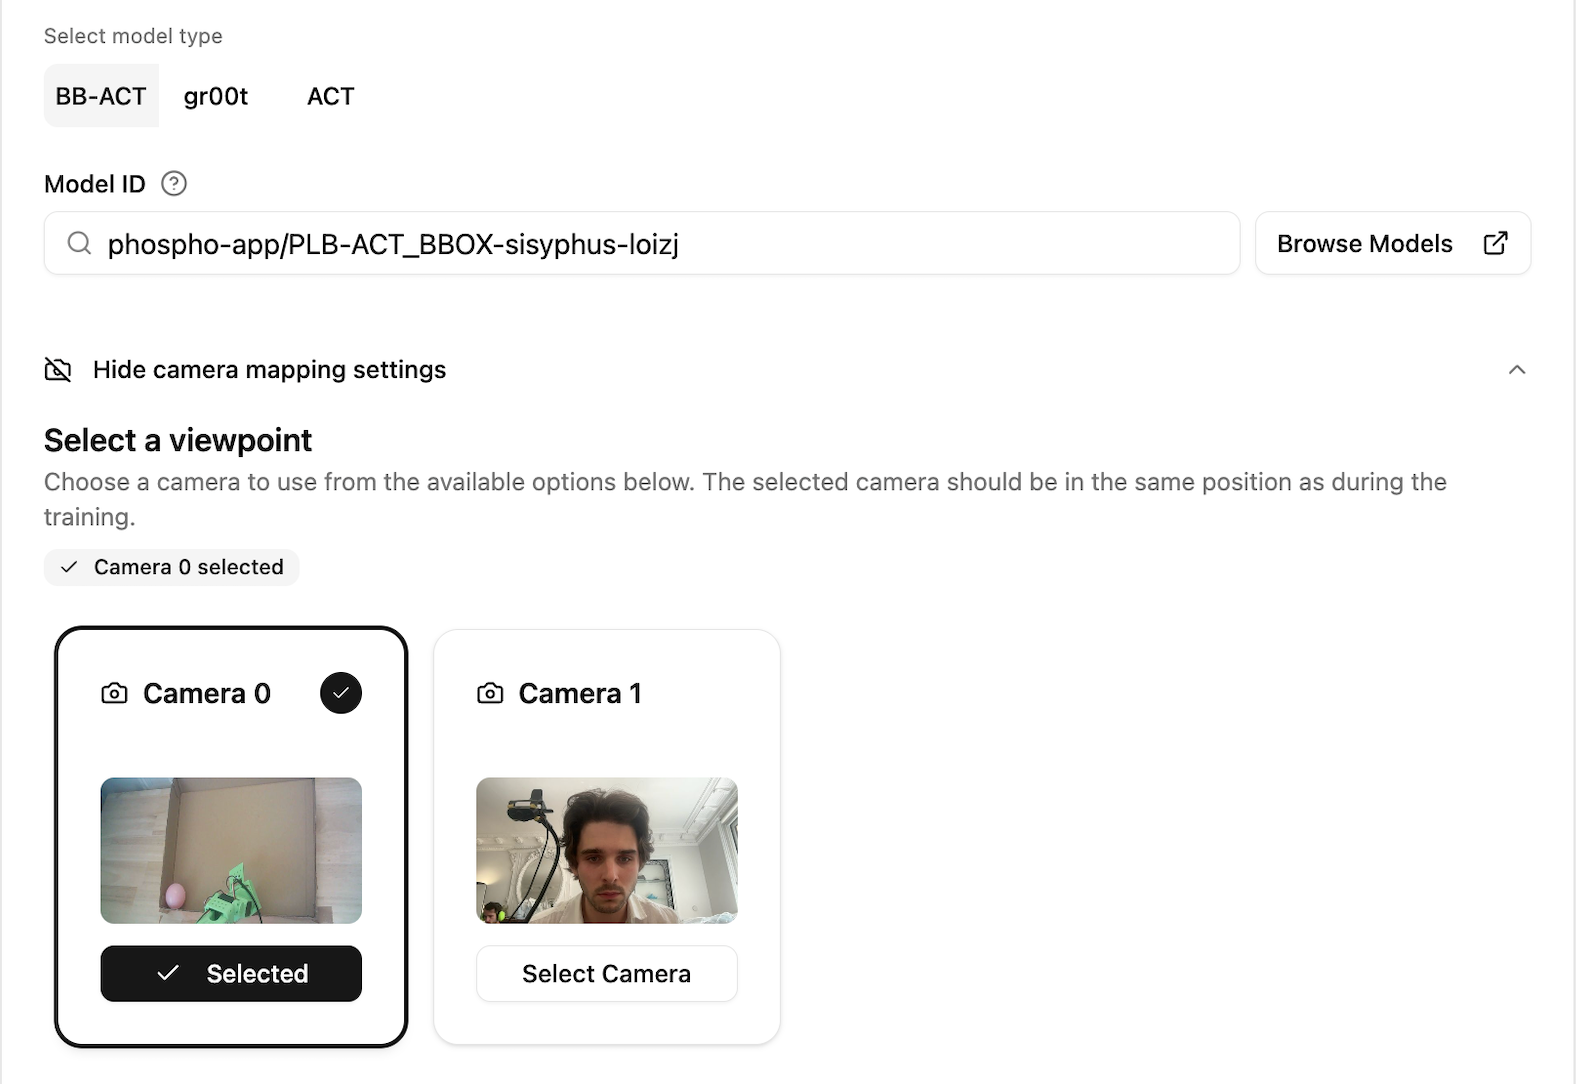
Step 3: Select the Correct Viewpoint
You must tell the system which camera is the context camera. In our setup, this was Camera 0. If you select your webcam (Camera 1 here), or any other camera that is not your context camera, the model will fail because it won't be able to see the full scene to detect the object.
Step 4: Enter the Instruction
In the "Start your model" field, type the exact same instruction you used during training. In our case, this is "pink ball".

Step 5: Start AI Control!
Click the Start AI control button. The model will now use the context camera to locate the "pink ball" using the bounding box detector, and the robot will execute the actions to pick it up.
How to record a dataset?
Before you can teach your robot, you need to create the right learning environment. A consistent and well-documented setup is the key to success.
Step 1: the setup
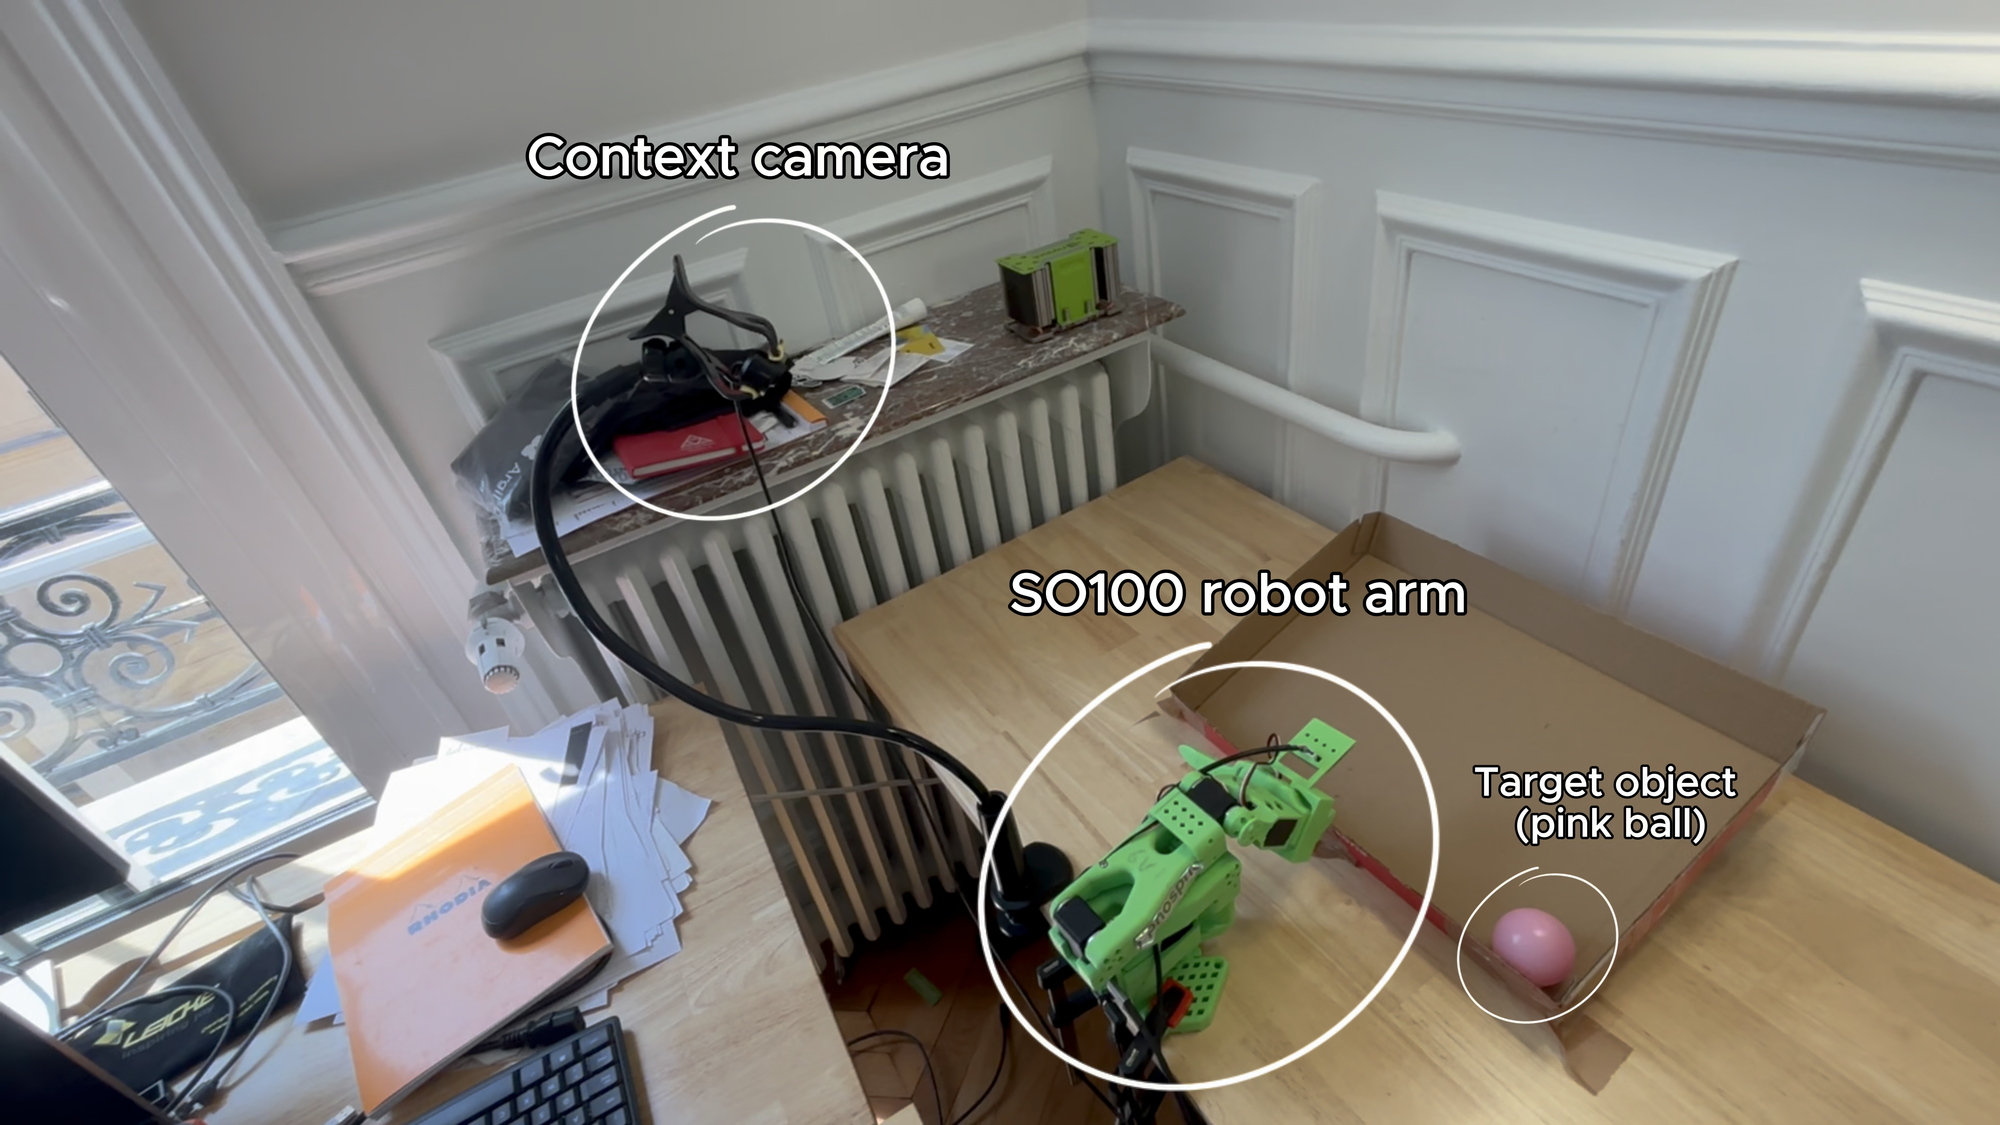
- Hardware:
- A phospho-compatible robot (the SO100 is used in this tutorial).
- A static context camera that overlooks the entire scene.
- The object you want the robot to interact with (e.g., a pink ball, a red lego brick).
Note: you don't need a wrist camera to train BB-ACT.
- Assembling the Scene
- Position Your Robot: Place your SO100 robot so that its arm can comfortably reach the entire workspace.
- Define the Workspace: Place your target object (the pink ball) within a defined area, like a shallow cardboard box. This helps constrain the environment.
- Position the Context Camera: This is the most critical step. The context camera should be mounted in a fixed position with a clear, high-angle view of the entire workspace, including the robot's base and the target object.
- Pro Tips
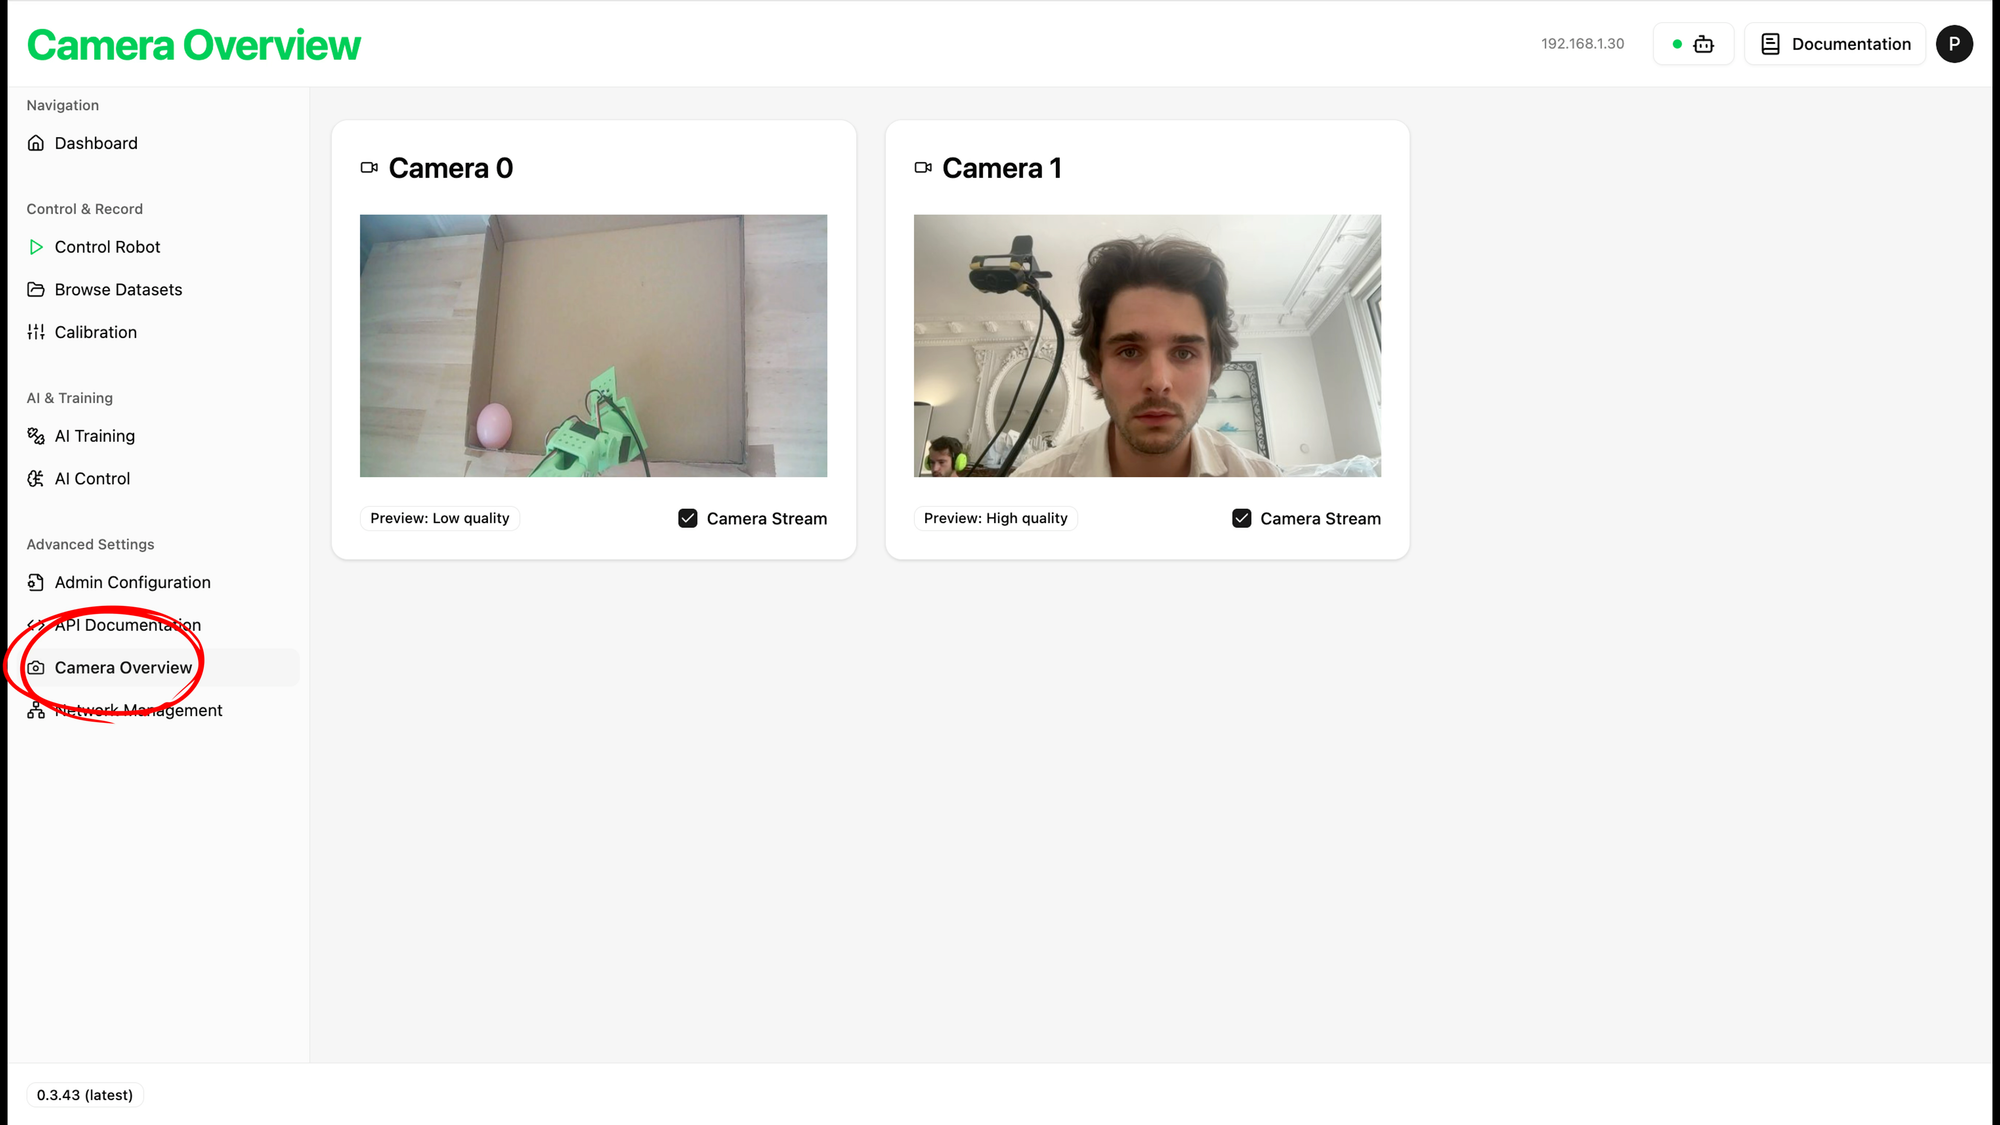
- The Context Camera is Your Model's Eyes: it provides the overall scene information to the AI. It's crucial that this camera can see the target object at all times. Before you proceed, verify your camera feed in the phospho dashboard.
- Navigate to Camera Overview in the dashboard.
- Confirm that the context camera's feed clearly shows the robot and the object you want it to pick up.
- The Context Camera is Your Model's Eyes: it provides the overall scene information to the AI. It's crucial that this camera can see the target object at all times. Before you proceed, verify your camera feed in the phospho dashboard.
- Consistency is Everything:
- The physical setup you use for recording your dataset must be identical to the setup you use for testing (inference) later. If you move the context camera even slightly after training, the model's performance will degrade significantly because its spatial understanding of the world will be incorrect.
- Once you have a good angle for your context camera, fix it tightly in place!
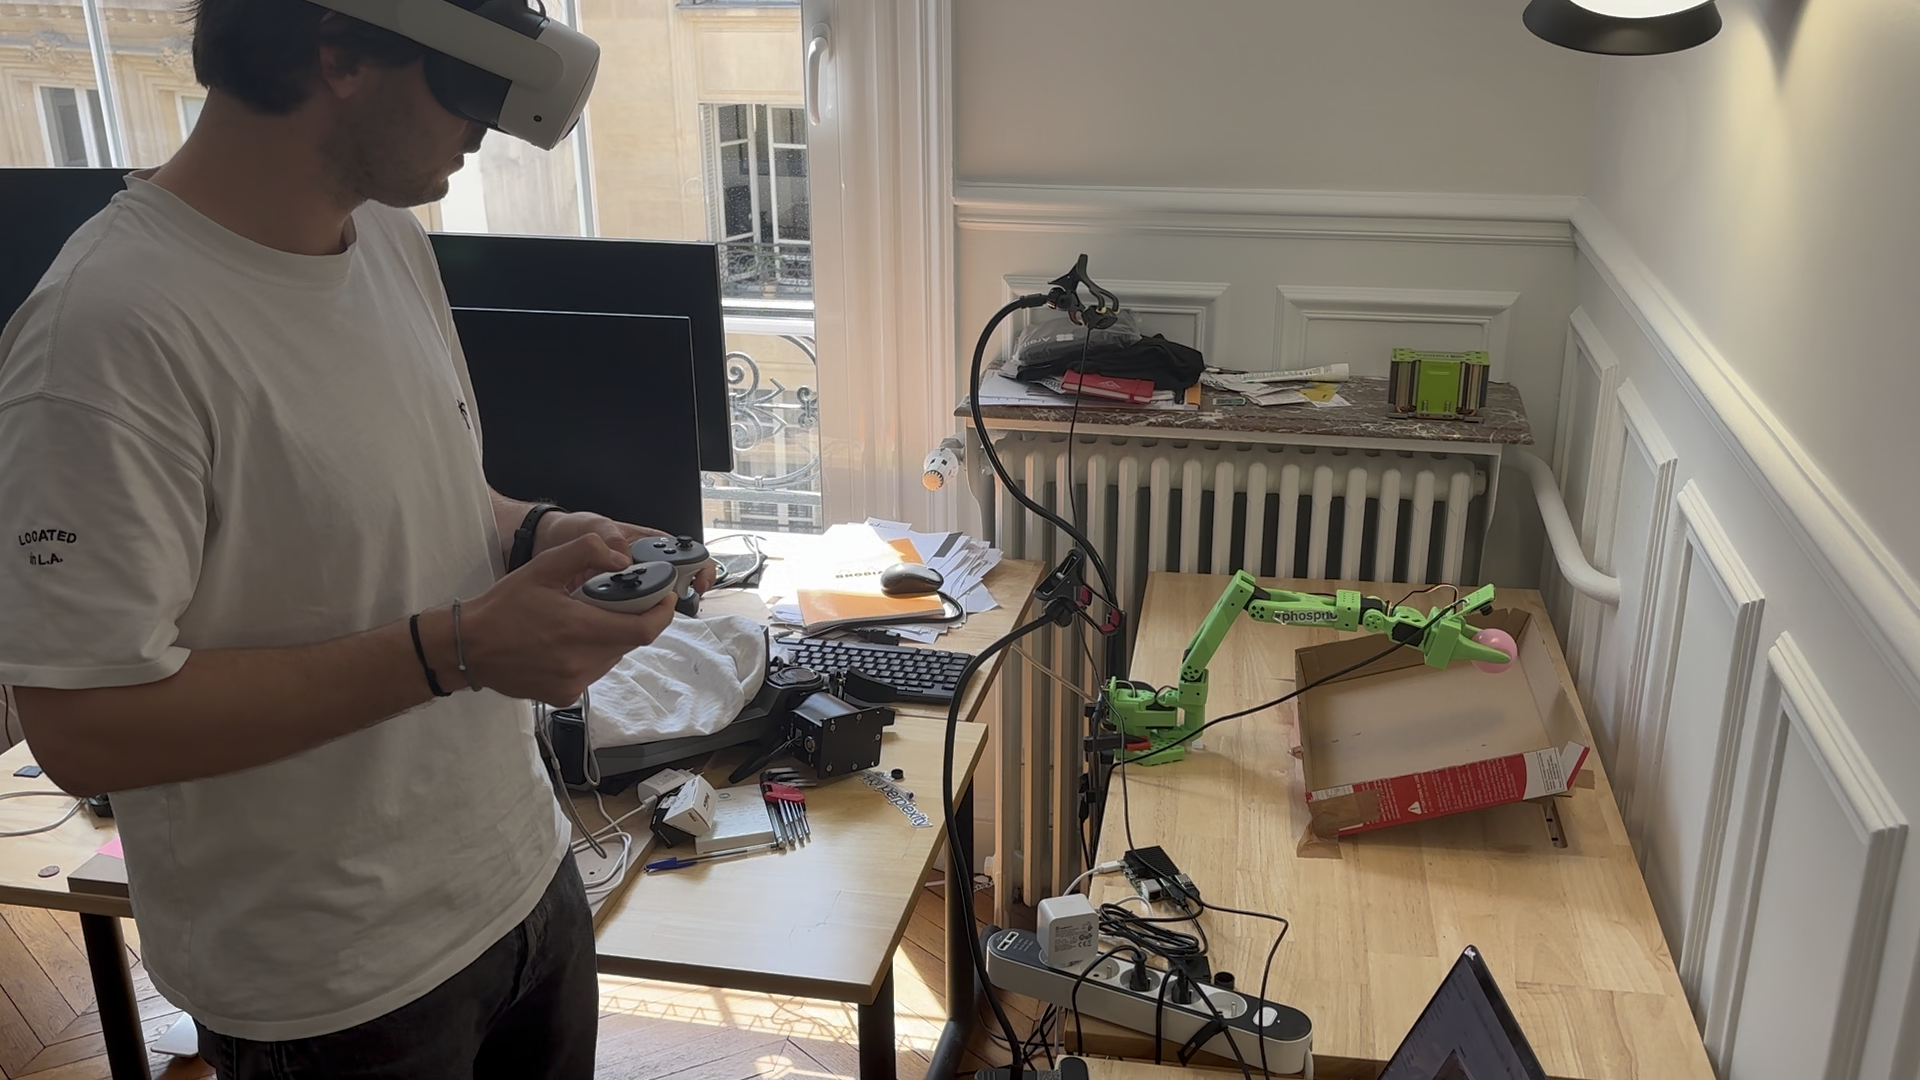
Step 2: Recording the Dataset
Now that the stage is set, it's time to record the data. Using your preferred control method. The method we find most effective is Meta Quest teleoperation. You can use the phospho teleoperation, available in the Meta Store.
The, you need to perform the task you want to teach your robot multiple times. Here, our task is to catch the pink ball and release it at the top of the cardboard slope.
Each successful demonstration is called an "episode." For a model like BB-ACT, a good starting point is around 30 episodes. The more high-quality demonstrations you provide, the better your model will learn.
If you're using phosphobot, your dataset is automatically uploaded to your Hugging Face account. Otherwise, you need to upload it yourself.
Conclusion
Congratulations! You have successfully trained and tested one of today's most advanced robotics AI models. By following these steps and paying close attention to the key tips, especially maintaining a consistent setup, you've unlocked the power of BB-ACT.
Now, go ahead and watch your robot interact with the world in a whole new way. Happy building.